最近、Visual Studio Codeにはまってるので各種設定等をメモ
Contents
Ubuntuへのインストール方法
Ubuntuへのインストール方法は以下を参照
https://code.visualstudio.com/docs/setup/linux
debパッケージではなく、microsoftのリポジトリを追加する方法で対応
|
1 2 3 4 5 6 7 8 |
$ sudo apt install curl $ cd ~/git $ curl https://packages.microsoft.com/keys/microsoft.asc | gpg --dearmor > microsoft.gpg $ sudo install -o root -g root -m 644 microsoft.gpg /etc/apt/trusted.gpg.d/ $ sudo sh -c 'echo "deb [arch=amd64 signed-by=/etc/apt/trusted.gpg.d/microsoft.gpg] https://packages.microsoft.com/repos/vscode stable main" > /etc/apt/sources.list.d/vscode.list' $ sudo apt install apt-transport-https $ sudo apt update $ sudo apt install code |
日本語化
Ctrl+Shift+Pもしくは、View -> Command Paletを開き、検索窓に”Configure Display Language”を入力して選択。
“Install additional languages”でJapanese Language Packをインストールする。
フォント
Source Han Code JPインストール
Adobeがフリーで提供している、コーディング用途の「Source Code Pro」をベースに、日中韓フォント「Source Han Gothic (和名:源ノ角ゴシック)」を組み合わせた等幅フォント。
コーディングに最適化(ゼロとオー、エルと壱などが分かりやすい)されており、かなり導入必須なフォントになってる。
Ubuntuへのインストール
GithubのREADME.mdに従ってインストールする。
https://github.com/adobe-fonts/source-han-code-jp
まずは、フォントソースをgit cloneする。
|
1 2 |
$ cd ~/git $ git clone https://github.com/adobe-fonts/source-han-code-jp.git |
次に、2018-04-17 Releaseで削除されたaddSVGtable.pyをGithubから取ってくる。
|
1 2 3 4 5 6 |
$ cd ~/git $ git clone https://github.com/adobe-type-tools/opentype-svg.git $ cd opentype-svg $ cp -r imgs ../source-han-code-jp/ $ cp -r fonts ../source-han-code-jp/ $ cp lib/opentypesvg/*.py ../source-han-code-jp/ |
source-han-code-jpのcommands.sh内のaddSVGtable.py指定をフルパス且つaddsvg.pyに変更する。
|
1 2 |
# if addSVGtable.py -s $svg ${nf} ; then : if ~/git/source-han-code-jp/addsvg.py -s $svg ${nf} ; then : |
|
1 2 |
# if addSVGtable.py -s $svg ${inf} ; then : if ~/git/source-han-code-jp/addsvg.py -s $svg ${inf} ; then : |
RequirementにあるAFDKOをインストールする。
これもAdobeがGithubに公開しているので、手順に従ってインストールする。
https://github.com/adobe-type-tools/afdko/
python仮想環境化でpip installする。
そのままsource-han-code-jpもインストールする。
|
1 2 3 4 5 6 7 8 9 10 11 |
$ sudo apt install python3-venv $ sudo apt install python3-pip $ cd ~/git/source-han-code-jp $ python3 -m venv afdko_env $ source afdko_env/bin/activate (afdko_env) $ pip install fonttools (afdko_env) $ pip install wheel (afdko_env) $ pip install opentypesvg (afdko_env) $ pip install afdko (afdko_env) $ pip install fonttools (afdko_env) $ ./commands.sh |
作成されたotfファイルを~/.fontsディレクトリにコピーして、フォントインストールを実行する。
|
1 2 3 4 5 6 7 8 9 10 11 12 13 14 15 16 17 18 19 20 21 |
$ cd ~/git/source-han-code-jp $ ls ./*/*.otf ./Bold/SourceHanCodeJP-Bold#0.otf ./Light/SourceHanCodeJP-Light#0.otf ./Bold/SourceHanCodeJP-BoldIt#0.otf ./Light/SourceHanCodeJP-LightIt#0.otf ./Bold/SourceHanCodeJP-BoldIt.otf ./Light/SourceHanCodeJP-LightIt.otf ./Bold/SourceHanCodeJP-Bold.otf ./Light/SourceHanCodeJP-Light.otf ./ExtraLight/SourceHanCodeJP-ExtraLight#0.otf ./Medium/SourceHanCodeJP-Medium#0.otf ./ExtraLight/SourceHanCodeJP-ExtraLightIt#0.otf ./Medium/SourceHanCodeJP-MediumIt#0.otf ./ExtraLight/SourceHanCodeJP-ExtraLightIt.otf ./Medium/SourceHanCodeJP-MediumIt.otf ./ExtraLight/SourceHanCodeJP-ExtraLight.otf ./Medium/SourceHanCodeJP-Medium.otf ./fonts/Zebrawood-Dots.otf ./Normal/SourceHanCodeJP-Normal#0.otf ./fonts/Zebrawood-Fill.otf ./Normal/SourceHanCodeJP-NormalIt#0.otf ./fonts/Zebrawood.otf ./Normal/SourceHanCodeJP-NormalIt.otf ./fonts/Zebrawood-Shadow.otf ./Normal/SourceHanCodeJP-Normal.otf ./Heavy/SourceHanCodeJP-Heavy#0.otf ./Regular/SourceHanCodeJP-Regular#0.otf ./Heavy/SourceHanCodeJP-HeavyIt#0.otf ./Regular/SourceHanCodeJP-RegularIt#0.otf ./Heavy/SourceHanCodeJP-HeavyIt.otf ./Regular/SourceHanCodeJP-RegularIt.otf ./Heavy/SourceHanCodeJP-Heavy.otf ./Regular/SourceHanCodeJP-Regular.otf $ mkdir ~/.fonts $ cp ./*/*.otf ~/.fonts/ $ fc-cache -fv |
Windows10へのインストール
Githubからフォントをダウンロード。
https://github.com/adobe-fonts/source-han-code-jp/releases/latest
解凍してできる、[解凍フォルダ]¥OTC¥SourceHanCodeJP.ttcを右クリック->すべてのユーザに対してインストールを実行。
フォント設定
ファイル->ユーザー設定->設定で設定画面を開き、検索バーに”フォント”を入力してフォント設定を開く。
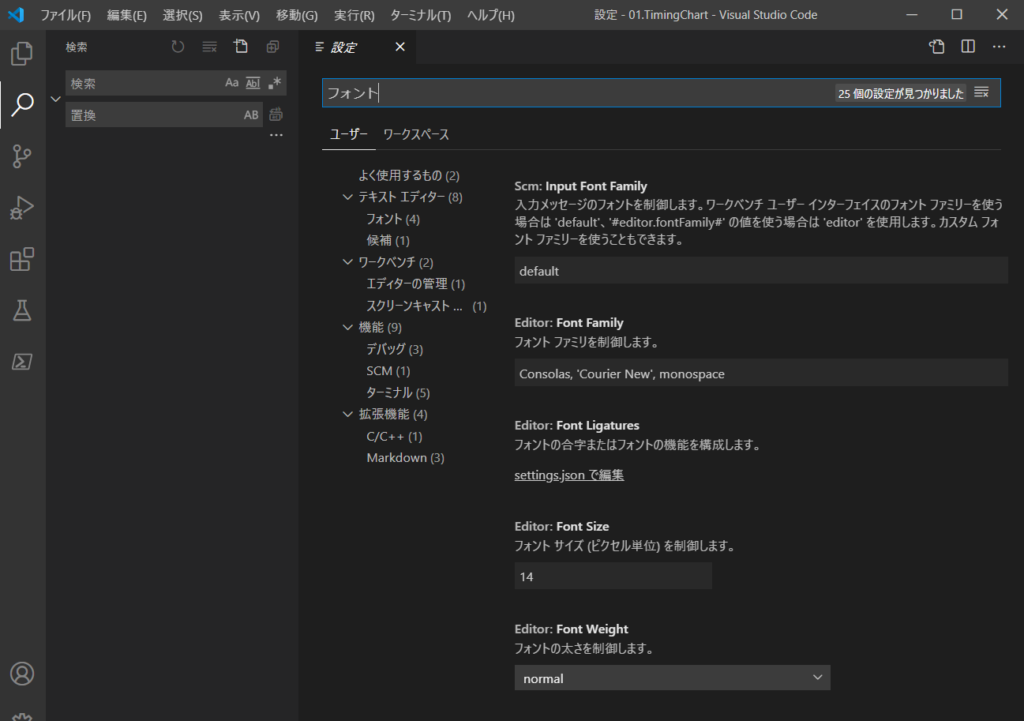
Editor: Font Familyに、”源ノ角ゴシック Code JP”を入力。
デフォルトでは、”Consolas, ‘Courier New’, monospace”が入力されているので、カンマでつなぐ。
左端のフォントが優先され、対応フォントがない場合はその次のフォントが選択される。
また、Editor: Font Weightを”normal”から”300″に設定する。
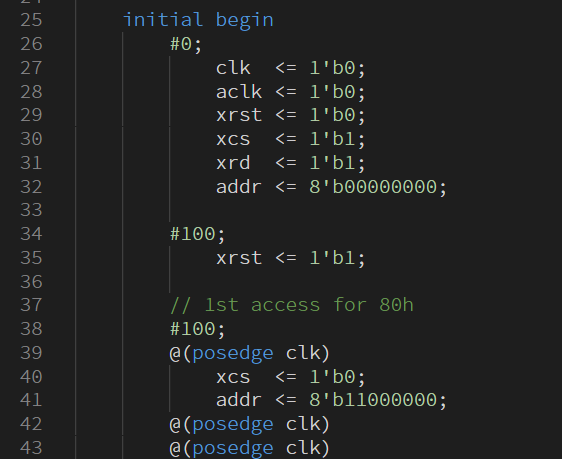
以下のように、ゼロとオー、エルと壱がはっきりと区別できるようになる。
初期設定
設定ファイル
ファイル->ユーザー設定->設定で、右上のファイルアイコンをクリックすると、settings.jsonが開くので以下を貼り付ける。
|
1 2 3 4 5 6 7 8 9 10 11 12 13 14 15 16 17 18 19 20 21 22 23 24 25 26 27 28 29 30 31 32 33 34 35 36 37 38 39 40 41 42 43 44 45 46 47 48 49 50 |
{ "editor.fontFamily": "'Source Han Code JP'", "editor.fontWeight": "300", "editor.fontSize": 15, "editor.formatOnPaste": true, // ペースト時に自動でフォーマット "editor.formatOnSave": true, // ファイル保存時に自動でフォーマット "editor.formatOnType": true, // 入力した行を自動でフォーマット "editor.minimap.renderCharacters": false, // ミニマップの表示文字をブロックに変更 "editor.minimap.showSlider": "always", // 表示領域をミニマップで常にハイライト "editor.multiCursorModifier": "ctrlCmd", // マウスでの複数選択時の修飾キーを変更 "editor.renderControlCharacters": true, // 制御文字を表示 "editor.renderIndentGuides": true, // インデントのガイドの表示 "editor.renderLineHighlight": "all", // 選択行のハイライト "editor.renderWhitespace": "all", // 半角スペースの表示 "editor.snippetSuggestions": "top", // スニペット候補の表示(Emmet) "editor.tabSize": 8, // タブのサイズ変更 "editor.insertSpaces": true, //"editor.wordWrap": "false", // エディターの幅で折り返し "emmet.showSuggestionsAsSnippets": true, // Emmet の候補を表示 "emmet.triggerExpansionOnTab": true, // TAB キーで Emmet を展開できるようにする "emmet.variables": { // Emmet で展開される HTML の言語を変更 "lang": "ja" }, "explorer.confirmDragAndDrop": false, // コピペの確認を表示しない "files.associations": { // ファイルと言語の関連付けを変更 ".*lintrc": "json" }, "files.insertFinalNewline": true, // ファイルの保存時に末尾を改行 "files.trimFinalNewlines": true, // ファイルの保存時に最終行以降をトリミング "files.trimTrailingWhitespace": true, // ファイルの保存時に行末の空白をトリミング "[markdown]": { "files.trimTrailingWhitespace": false // Markdown のファイルは行末の空白をトリミングしない }, "html.format.contentUnformatted": "pre, code, textarea, title, h1, h2, h3, h4, h5, h6, p", // タグ内の記述はフォーマットしない "html.format.extraLiners": "", // head, body, /html タグの前に改行を入れない "html.format.unformatted": null, // フレージング・コンテンツ(旧インライン要素のようなタグ)はフォーマットしない "html.format.wrapLineLength": 0, // 行の文字数制限を無くし自動で改行させない "html.autoClosingTags": false, // HTML タグの自動クローズを有効/無効にします。 "window.openFoldersInNewWindow": "on", // 新規ワークスペースを別ウインドウで開く "window.title": "${activeEditorMedium}${separator}${rootName}", // ウインドウ上部に表示する文字列の設定 "workbench.editor.labelFormat": "short", // タブに表示する文字列の設定 "workbench.editor.tabSizing": "shrink", // タブの表示設定 "workbench.startupEditor": "none", // Welcome Page を表示しない } |
プラグイン
- Path Autocomplete
パス候補を表示 - vscode-icons
フォルダやファイルにあったアイコンを表示 - Bracket Pair Colorizer
カッコの対応を見やすく表示 - Verilog-HDL/SystemVerilog/Bluespec System Verilog support for VS Code
幾つかあるverilog-HDLプラグインの中でダウンロード数が多いこれを使用 - awesome vhdl
幾つかあるVHDLプラグインの中でダウンロード数が多いこれを使用 - Python extension for Visual Studio Code
- Rainbow CSV
カンマ区切り毎に色付けして見やすく表示